
This step can only be handled by the administrator of the account!
Before you can create parcels, generate QR codes, or manage traceability data, you must set up a domain. A domain represents your organization’s traceability workspace and defines where data, users, and configurations live.
Creating your first domain is a one-time setup step that prepares your environment for daily operations.
-
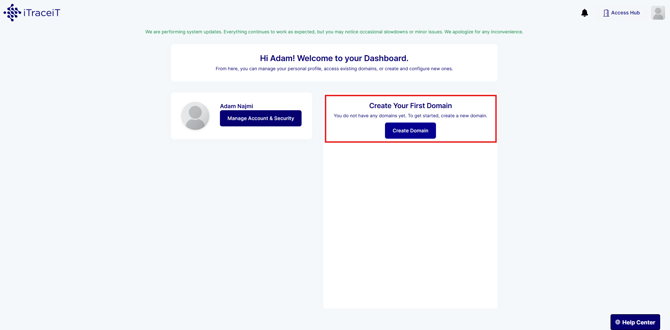
Step 1: Access Your Dashboard. If you do not yet have any domains, you will see a section titled “Create Your First Domain”.
-
Step 2: In the “Create Your First Domain” section, click “Create Domain”. This action launches the domain creation flow, which will guide you through the required setup steps.
-
Step 3: In the “Domain Identity” step, enter the core information that identifies your organization.
You must complete the following fields:
-
-
Domain / Company Name
-
Activity Sector
-
Country
-
City
-
Company main email
-
These details are used to create and identify your organization’s domain in iTraceiT.
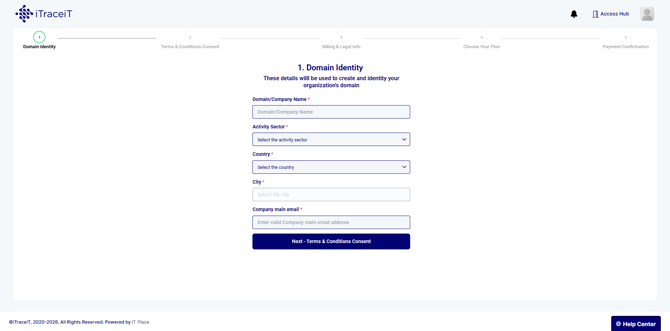
Once all required fields are completed, click “Next – Terms & Conditions Consent”.
-
Step 4: Review the End User License Agreement (EULA) and the Privacy Policy.
-
Check the box confirming your acceptance of the EULA and Privacy Policy
-
Click “Create my domain”
-
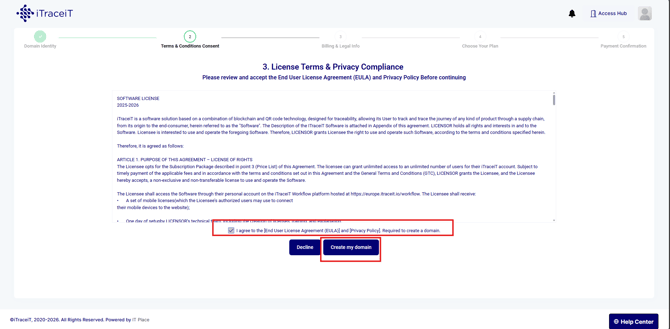
Accepting these terms is mandatory to proceed with domain creation.
-
Step 5: In the “Billing & Legal Info” step, provide your organization’s legal and billing details. The required information includes:
-
-
Default billing profile name
-
Identifier type (VAT / Tax Number, DUNS Number, or Company Identifier)
-
Legal company name
-
Country
-
Billing address
-
Invoice email address
-
This information is used for invoicing and contractual purposes.
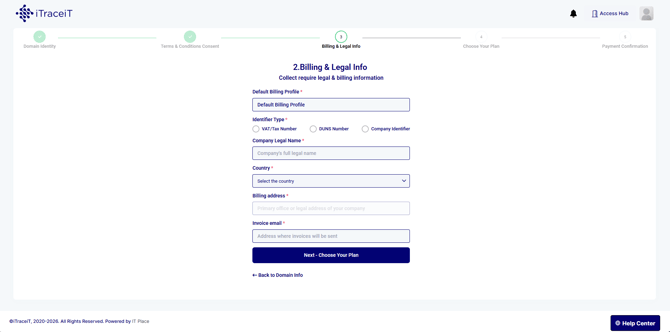
When completed, click “Next – Choose Your Plan”.
-
Step 6: Select the subscription plan that fits your organization’s needs. At this stage, you can:
-
Choose between monthly or yearly billing
-
Add optional add-ons such as additional users, storage, or support services
-
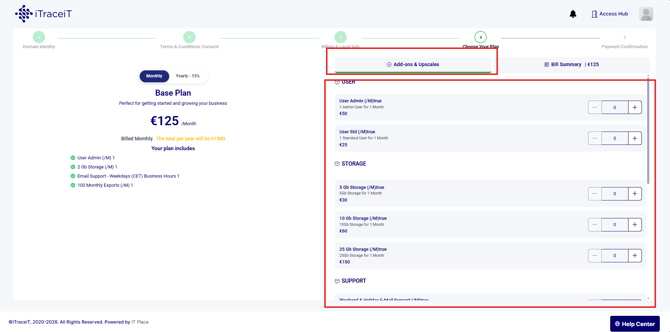
Review the bill summary displayed on the right side to confirm your selection.
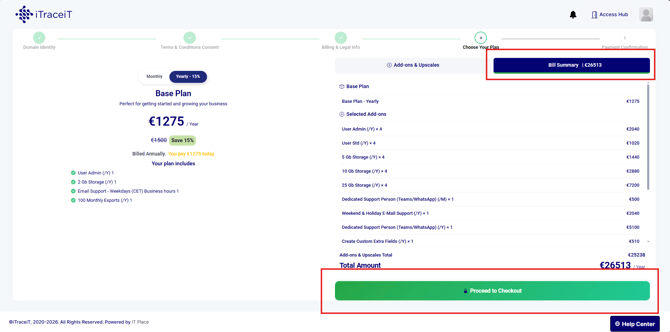
Click “Proceed to Checkout” to continue.
-
Step 7: Review your order details on the payment confirmation screen.
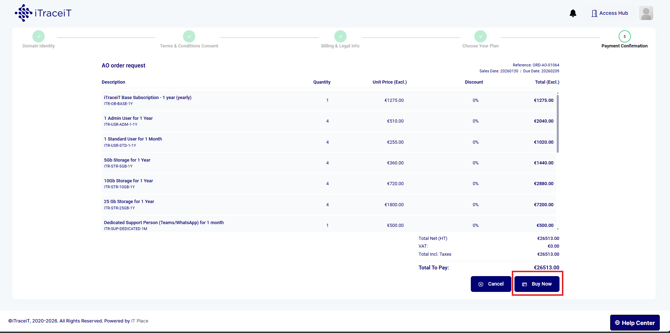
To finalize the setup:
-
-
Click “Buy Now”
-
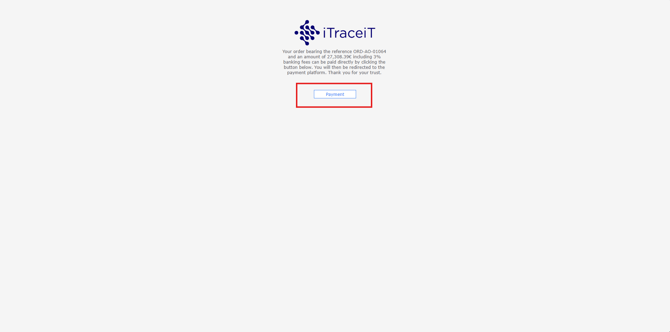
You will be redirected to the secure payment page
-
Select your payment method and complete the transaction
-
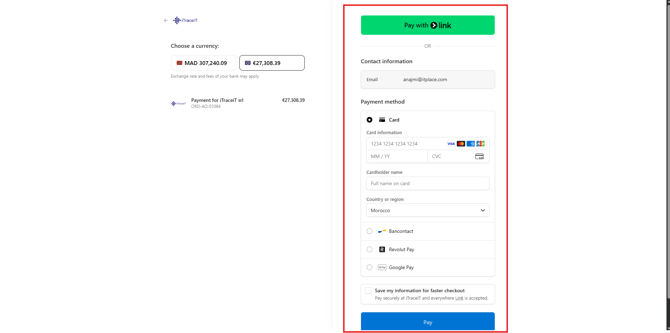
Once payment is confirmed, your domain is activated.
-
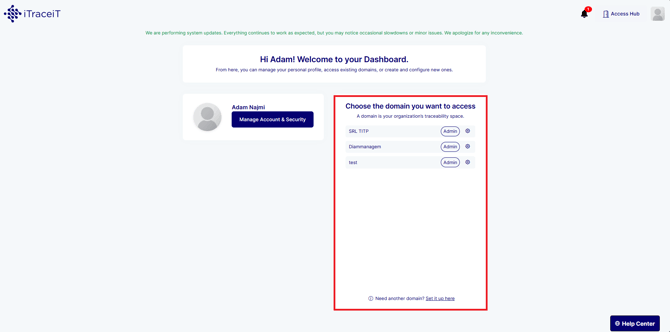
Step 8: After successful payment, return to your dashboard. In the section “Choose the domain you want to access”:
-
Select your newly created domain
-
Click on it to enter your organization’s traceability workspace
-
Setting up your first domain is the starting point for using iTraceiT. By defining your organization, legal details, and subscription, you create a secure workspace ready for traceability, collaboration, and certification workflows. Once your domain is active, you can begin inviting users and creating your first parcels.