
Before you can begin working with QR codes, merging parcels, splitting items or exporting data, your domain must be created and activated.
This article explains how to complete this first setup step from the moment you log in.
Watch the tutorial
Learn how to create your domain step by step in this short video demonstration.
Now that you have seen the full process, let us go through each step in detail.
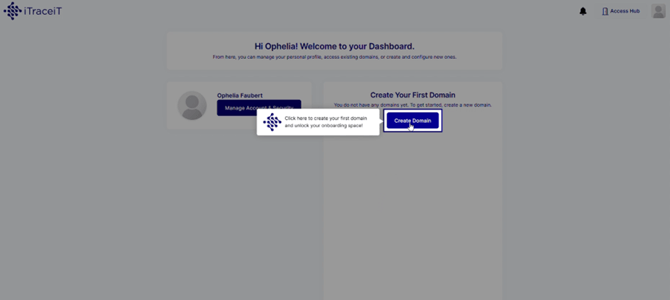
Step 1: In the Hub click on the button “Create Domain”
When you log in for the first time, your dashboard (hub) displays the option to create your first Domain.
Click Create Domain to begin the setup.
Step 2: Fill out your Domain Identity
A form will appear asking for your company details. Fill in all required fields:
- Domain or Company Name
- Activity Sector
- Country
- City
- Company Main Email
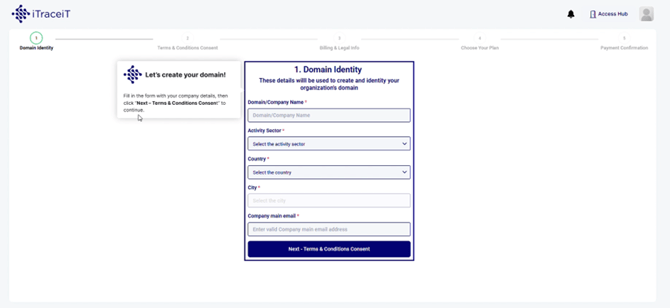
Click on the button Next – Terms and Conditions Consent to continue.
Step 3: Accept the Terms and Conditions
Review the License Terms and Privacy Policy.
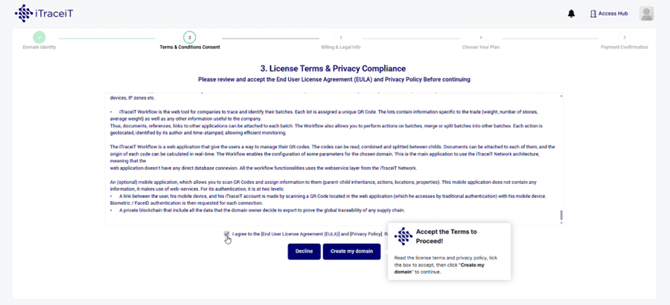
To proceed, tick the checkbox to accept the conditions, then click on the button Create my domain.
Step 4: Enter your Billing and Legal Information
You will now complete your official billing details. Fill in the following fields:
- Identifier Type
- Company Identifier
- Company Legal Name
- Country
- Billing Address
- Invoice Email

Click on the button Next – Choose Your Plan to continue.
Step 5: Choose your Subscription Plan and Add-ons
Select your subscription type, either Monthly or Yearly.
You may also add optional features such as additional users, storage, exports or customization options.
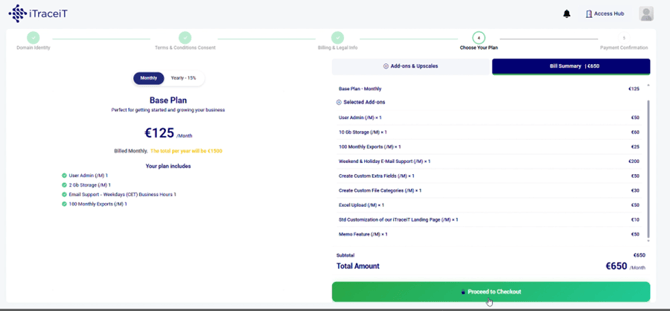
After selecting your plan and add-ons, click on the tab Bill Summary, then on the button Proceed to Checkout.
Step 6: Review and Confirm your Order
You will see a summary of all selected items, their quantities and the total cost.
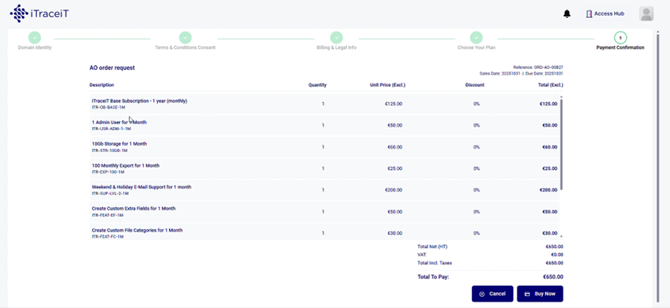
Click on the button Buy Now to continue.
Step 7: Complete your Payment
You will be redirected to the secure payment page.

Select your currency, enter your card details and click on the button Pay to finalize your subscription.
Once the payment is confirmed, a success message will appear.
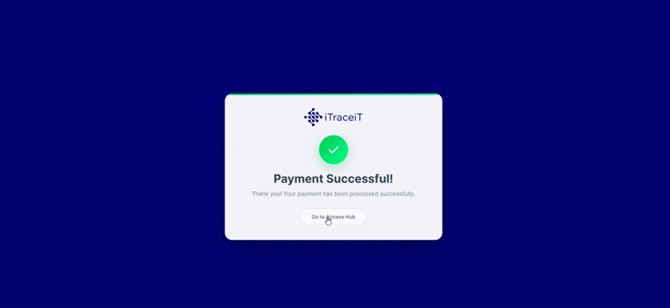
Click on the button Go to Access Hub to return to your iTraceiT account.
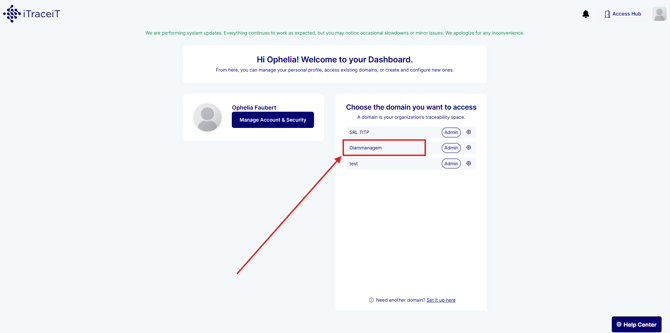
Step 8: Access your domain
To access your domain and begin your traceability journey, click on the name of the domain on the list of domains.
Creating your Domain is an essential onboarding step that unlocks your full workspace in iTraceiT. Once your Domain is active, you can start building your traceability processes, importing parcels and managing data across your supply chain.